
Color panel
Set a project's primary, secondary, and tertiary preset colors, which every effect that uses them picks up.
The Color panel sets the project's three preset colors side by side: primary, secondary, and tertiary. Effects reference them by name, so a change here changes every effect that uses the color.
Related concept: Color, which explains the three color modes, Tuning, how layers stack, and how a color lands on each fixture.
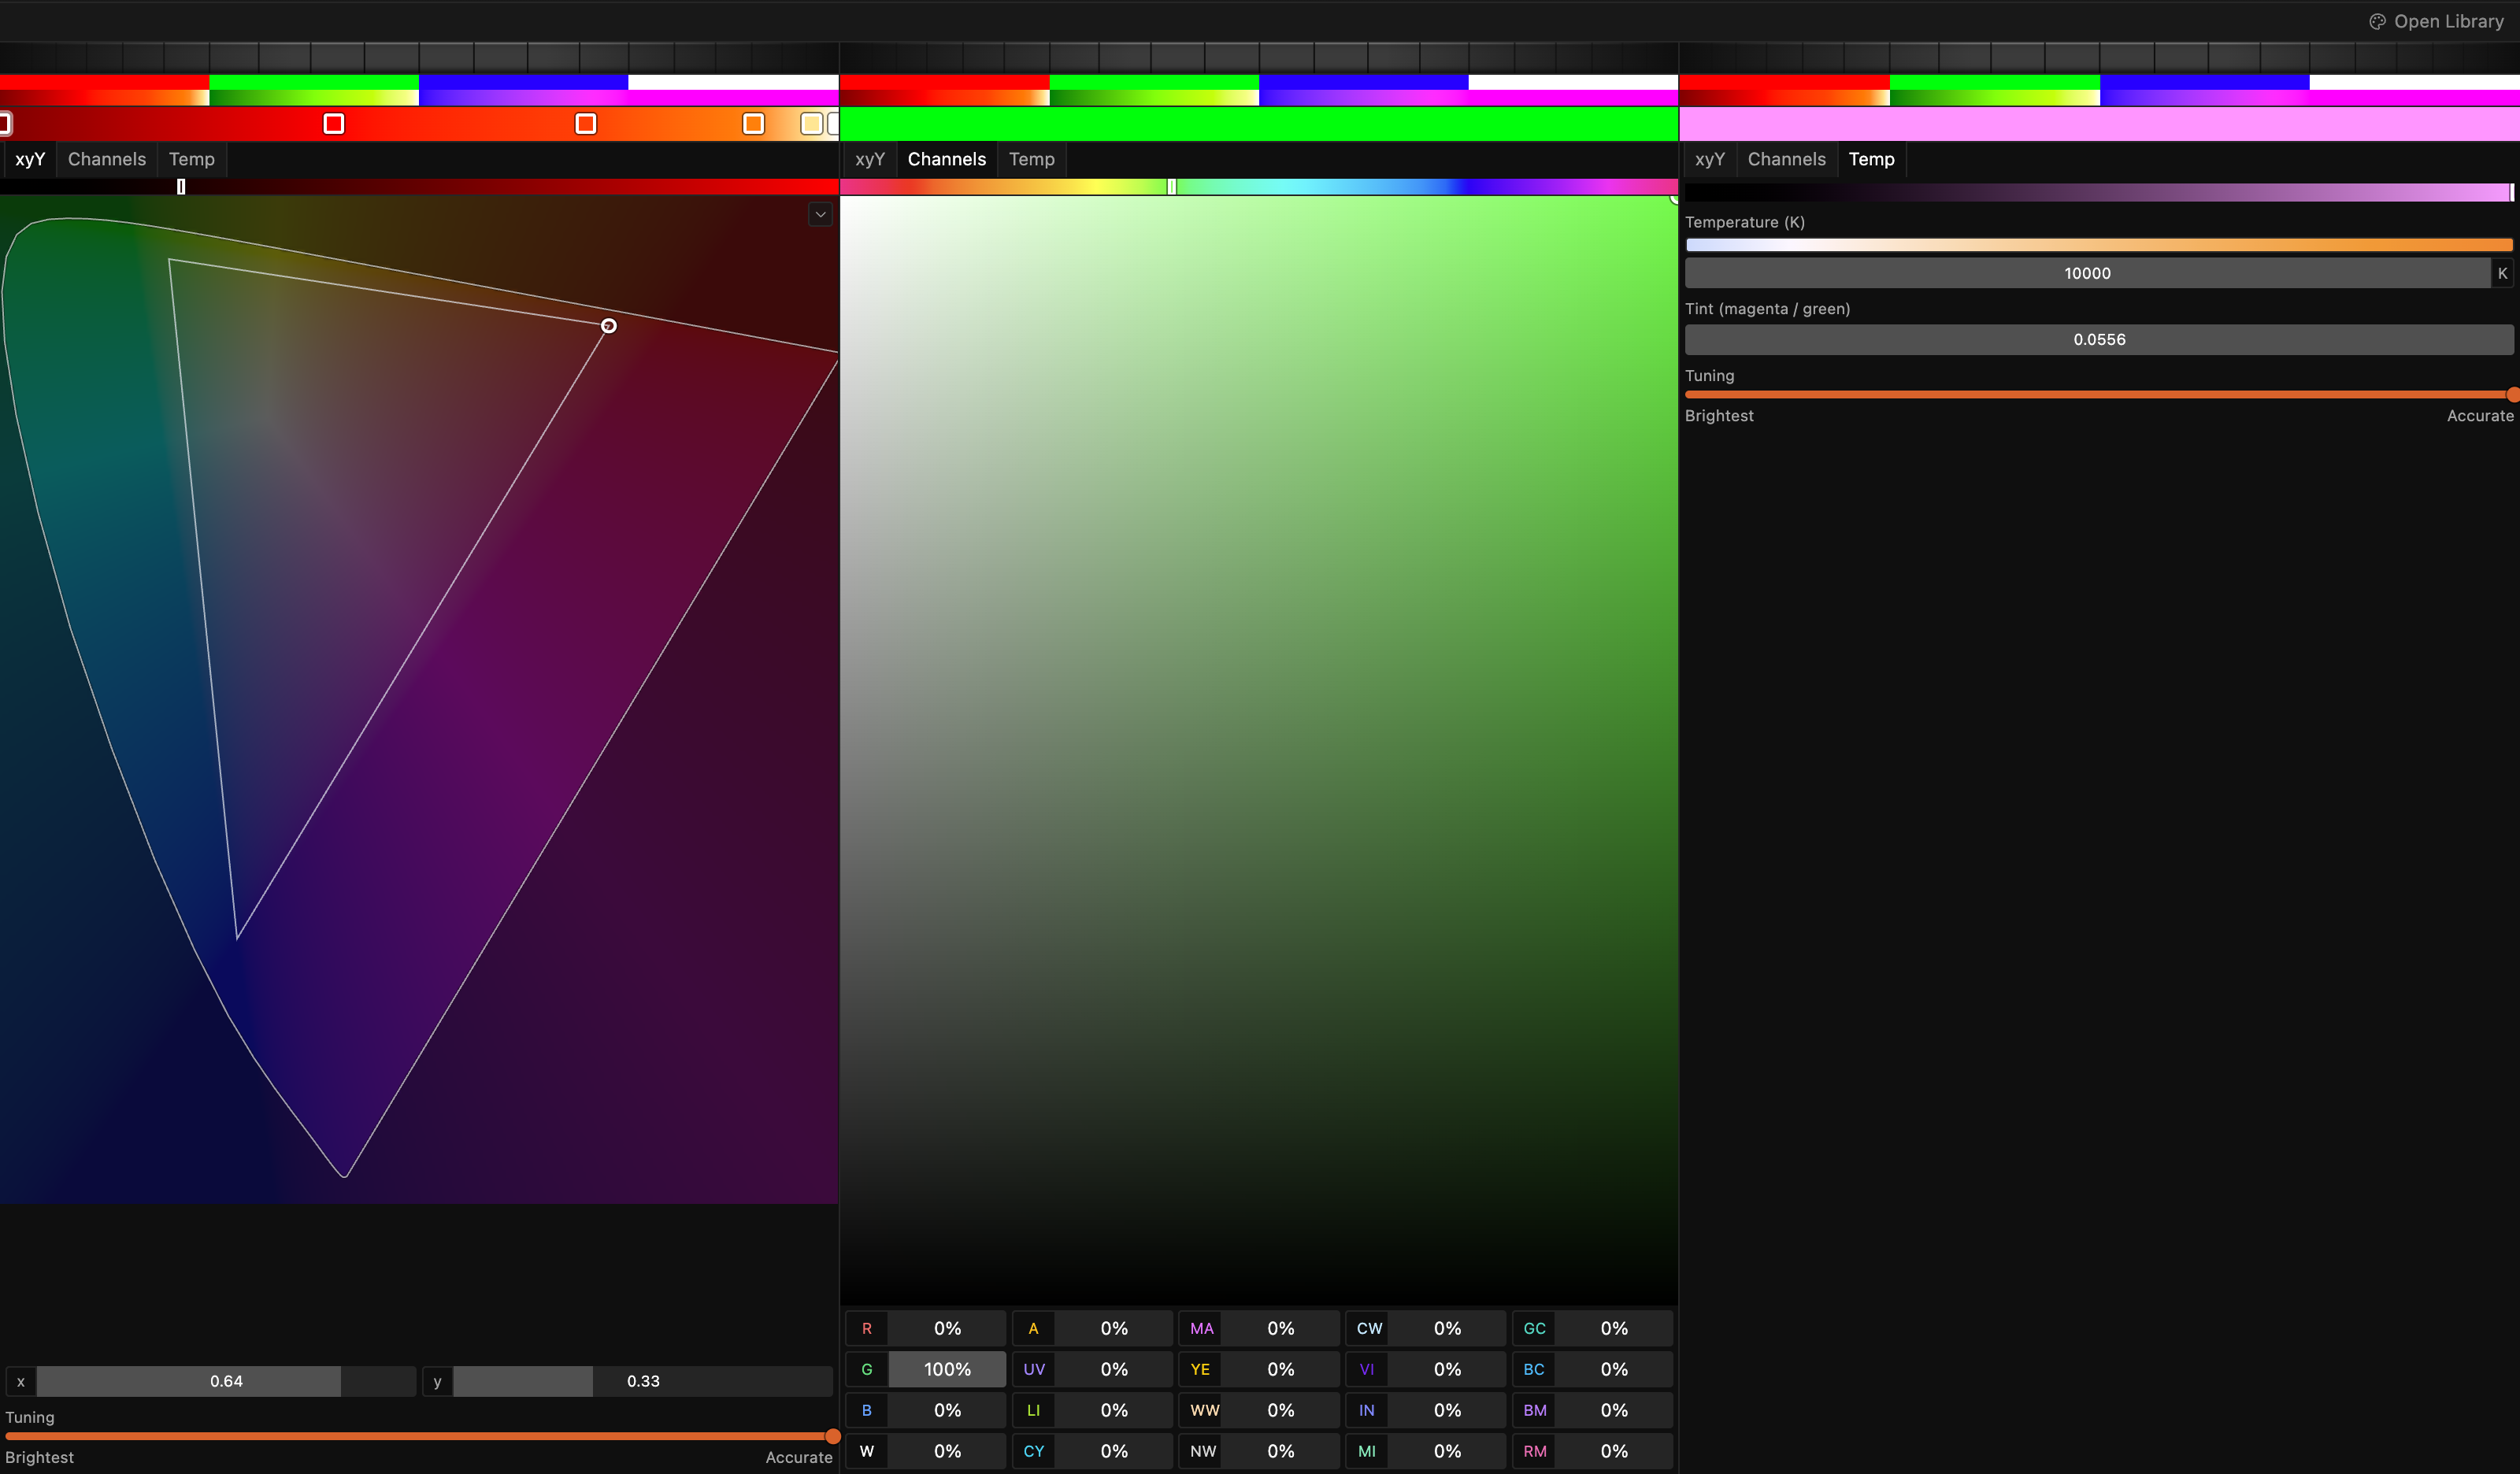
One column per preset color
Each column has the same layout, from top to bottom:
- A hue strip. Drag across it, or scroll over it, to rotate the hue of the whole gradient. With the strip focused, the arrow keys turn it by 5°, and by 30° with
Shift. On a Temp gradient it moves the whites between warm and cool instead. - The swatches of the active color library. Click one to apply it to this preset.
- The gradient bar with its stops. Right-click the bar and choose Add stop here to insert a stop at the cursor. Drag a stop to move it, or focus it and press
←and→to move it by 1% of the bar (10% withShift). Click a stop to edit its color, and right-click a stop and choose Delete stop to remove it. - The xyY, Channels, and Temp tabs, which set the color mode of the whole gradient. When you click a tab, Spectralite converts every stop.
- The picker for the selected stop.
The picker in each mode
xyY shows the CIE chromaticity diagram. Click or drag in it to set the hue and saturation, or type the x and y values. A chevron in the corner of the diagram toggles reference outlines for the Rec.709 (sRGB) and P3 gamuts. It also switches between the CIE 1931 and CIE 1976 diagrams.
The thin bar above the diagram is Brightness, from 0 to 100%, where 100% is as bright as this color gets on each fixture. Drag it, or focus it and press the arrow keys to step 1% (10% with Shift). Tuning sits below the fields. It runs from Brightest to Accurate and applies to the whole gradient. See Tuning for what it does.
Channels shows a hue bar, a saturation and brightness area, and a grid of twenty percentage fields, one per emitter role: R, G, B, W, A, UV, LI (lime), CY, MA, YE, WW, NW, CW, VI (violet), IN (indigo), MI (mint), GC, BC, BM, and RM (pink). Hover a field for its full name. Each value is that emitter's share of its full light output. The hue bar and the area change only the red, green, and blue fields. When the hue bar has focus, the arrow keys step it by 1° (36° with Shift). The hue wraps from 360° back to 0°.
Temp shows the same Brightness bar, then Temperature (K) as a slider and a kelvin field, Tint (magenta / green), and Tuning.
Color libraries
Above each color is a grid of swatches from the active color library, which works like a gel swatch book. Click a swatch to apply it to that preset color. Open Library in the toolbar opens the full set. There you can browse and import libraries and manage which swatches show as shortcuts. You can also create, edit, copy, or delete colors.
MIDI control
Map a controller to the preset colors in the MIDI Input dialog. A control can adjust the hue of the primary, secondary, or tertiary color, or select colors from the active library or the full library.
Related
- Color explains the model behind the three modes.
- MIDI Input dialog maps a controller to color controls.
- Node Editor builds effects that reference the preset colors.